
Using the Gmail API to send multiple emails (mail merge)
One of the annoying things my wife and I discovered when sending out wedding invitations via email was that many of the emails were categorized as junk. Specifically, this was caused by having a mass BCC email. For events where you don’t want individuals to see who is invited, there are two options: include everyone in the BCC line, or send everyone the same email one-at-a-time to reduce the chances of it being blocked by the spam filter. I made a mental note to look into better systems to automate this process. Now that we preparing to send a mass email for the birth of our first child, I knew it was time to revisit this problem.
In the rest of this post, I’ll provide a detailed walk-through of i) how to set up the Gmail API through your Google Cloud account, and ii) walking through the modular repo I set up to send mass emails for a variety of use cases (mail merge). Unlike other google APIs, the Gmail one is free to use, but does impose a quota restriction of 100 calls per second. The solution outlined in this post is designed for sending emails for reasonably events (in the hundreds, or low thousands), so that the runtime will be less than a minute.
(1) Setting up the Gmail API
As a first step, head on over to the Google Cloud homepage. I’ll assume you have a google account (how else would you have a Gmail?), but if not, go ahead and create one as a step zero.
On the Google Cloud home page, just right of the hamburger icon, there will be an icon to create a new project (Step 1 below). I’ve gone ahead and created one called gmailAPI. Projects are important because these let you specify which APIs will be enabled, create the OAuth keys which will be used by the python scripts, and limit sending emails from your account to only your account.
Step 1: Set up a project on Google Cloud

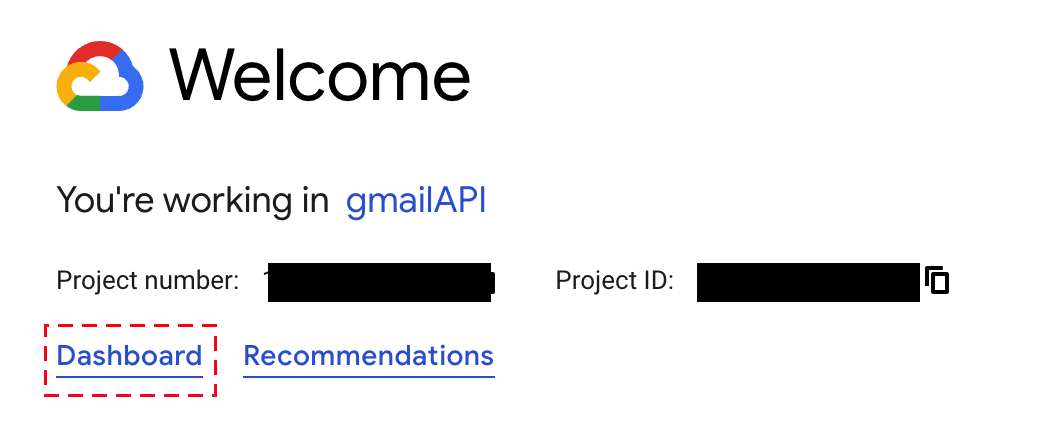
After selecting the new project, click on the dashboard icon (Step 2 below).
Step 2: Go to your project's dashboard
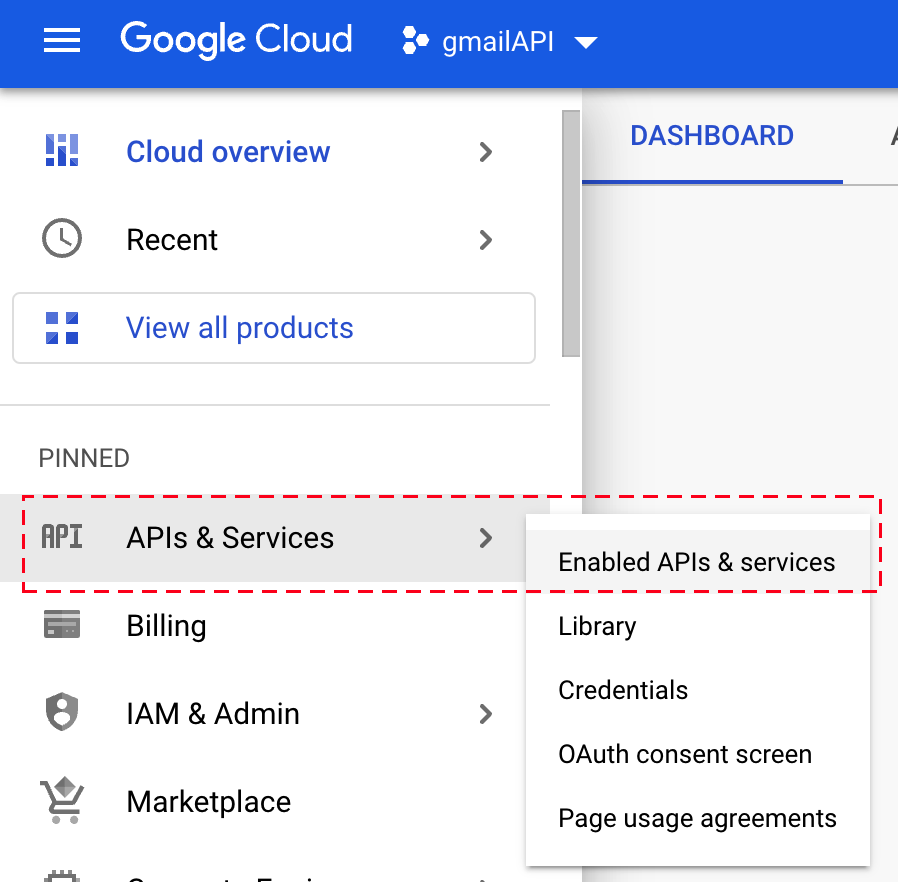
Go to the APIs & Services button, and select the Enabled APIs and Services from the drop-down menu (Step 3 below).
Step 3: Select Enabled APIs and Services
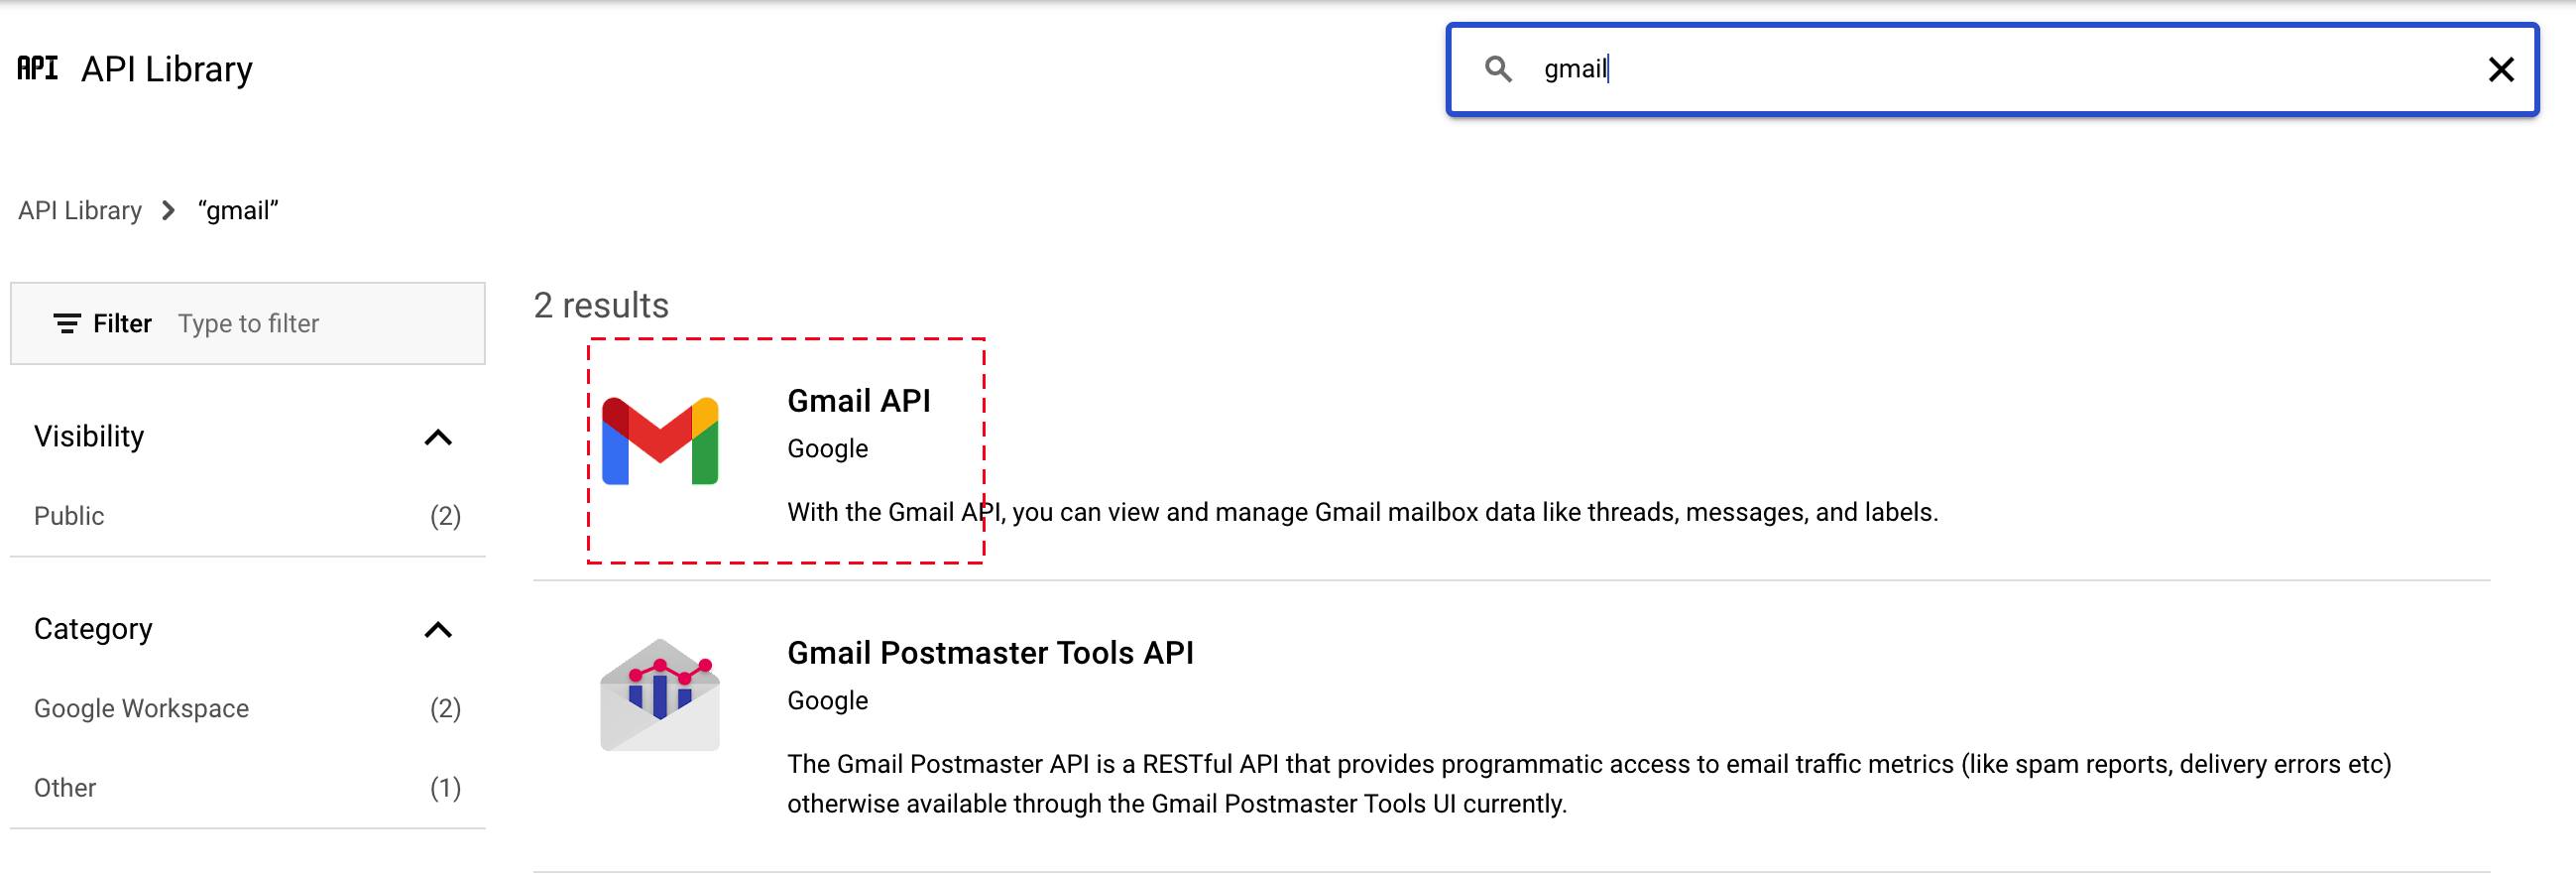
Click the API Library button, search for “gmail”, and then click the icon (Step 4 below).
Step 4: Find the Gmail API
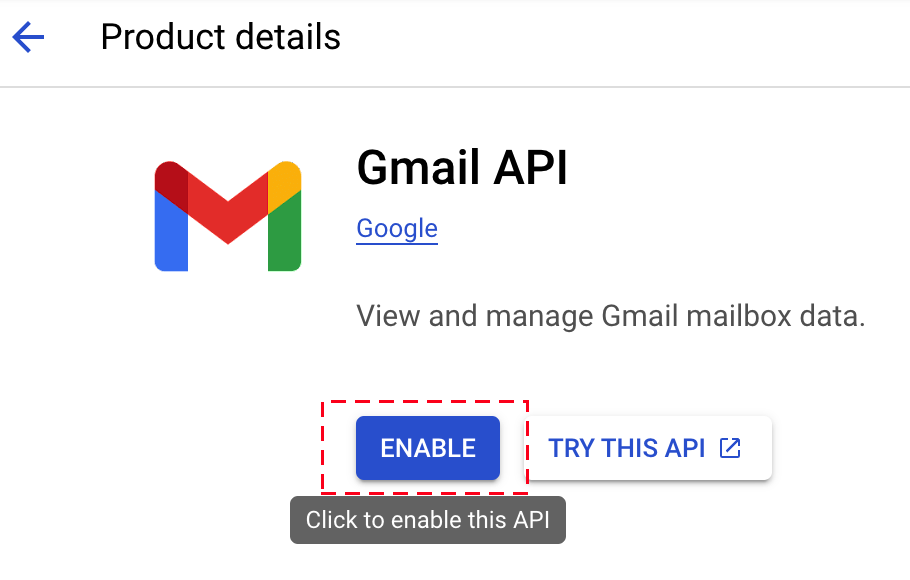
Enable the API for this project.
Step 5: Enable Gmail
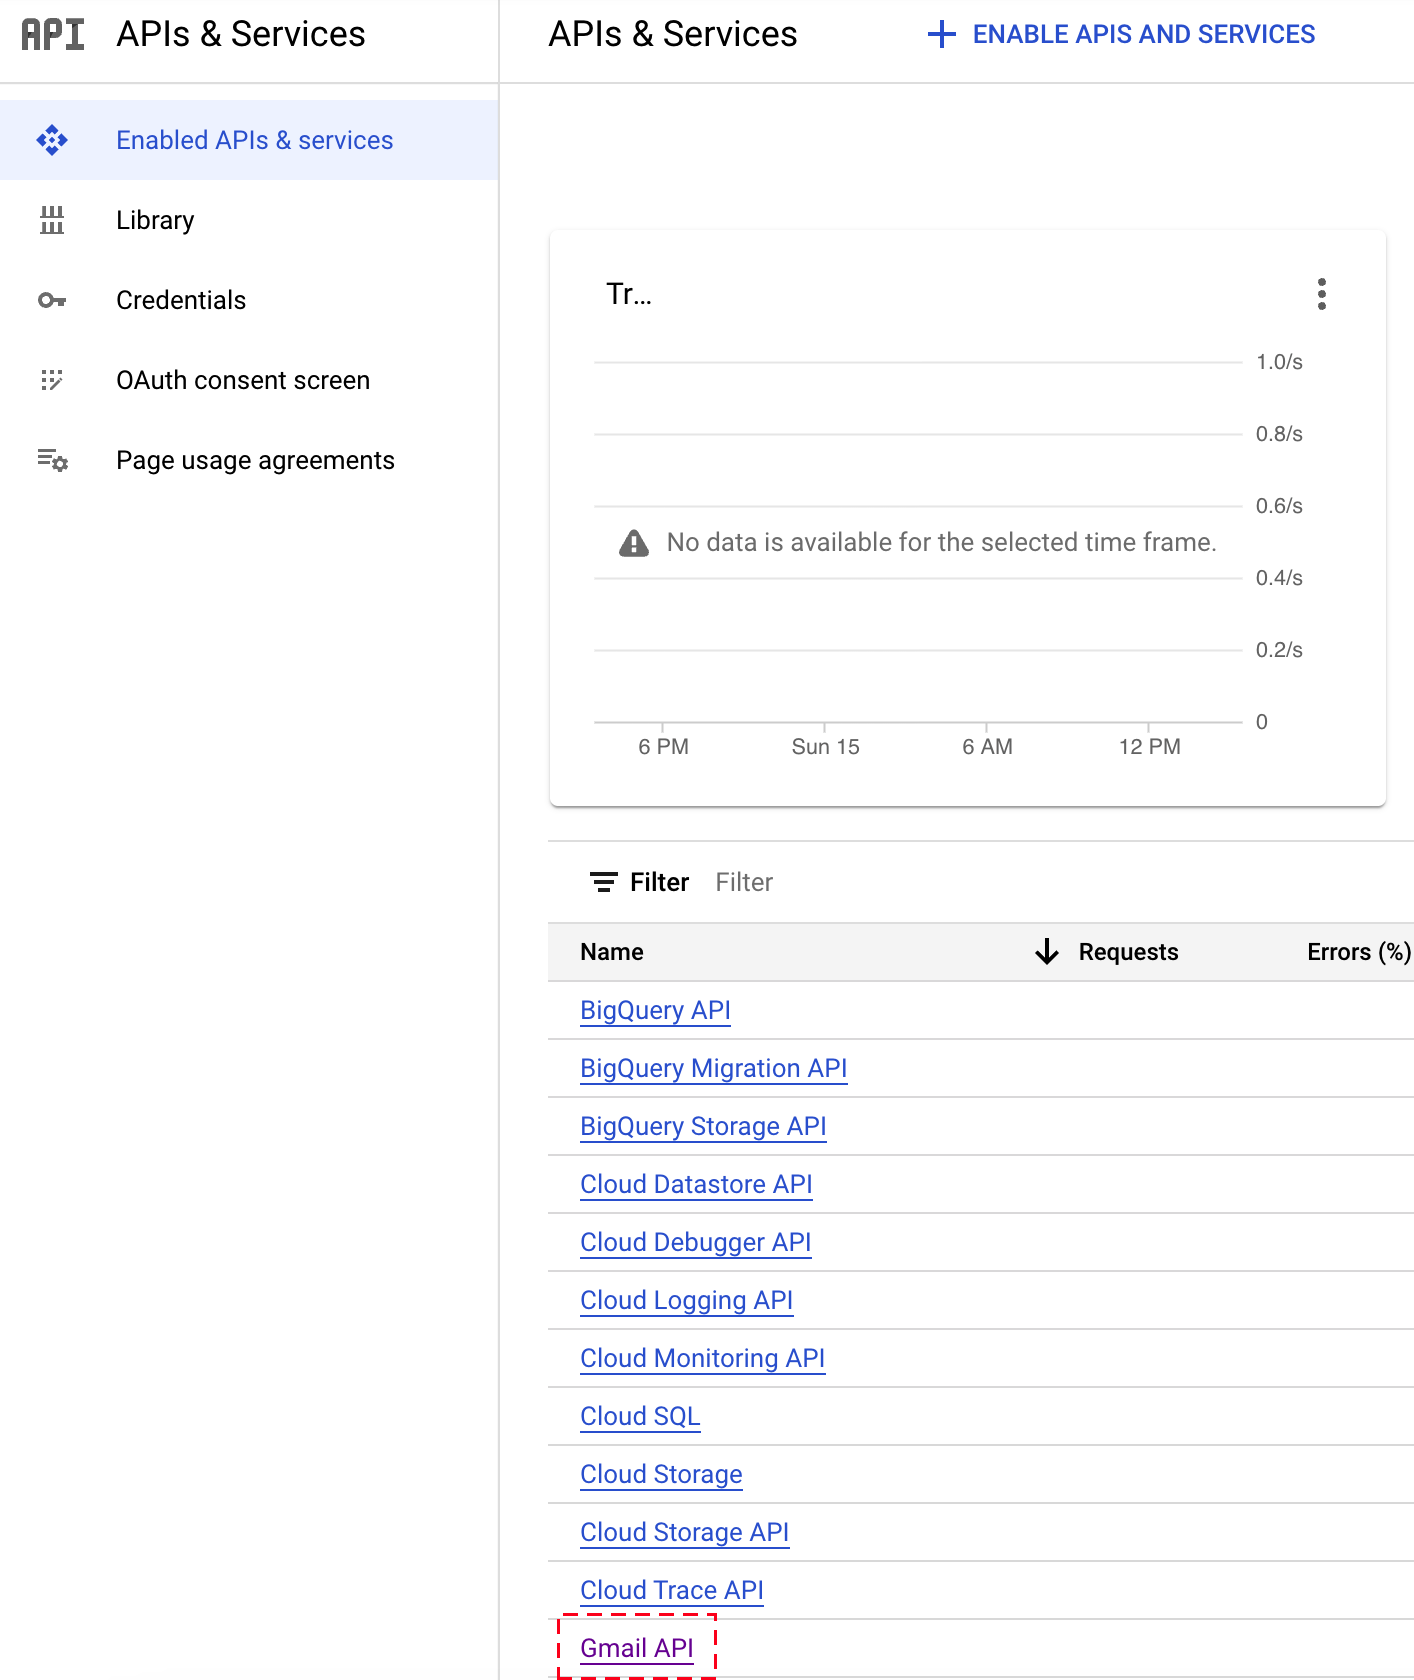
When you return to the Enabled APIs and services button, you should now see the “Gmail API” (see example below).
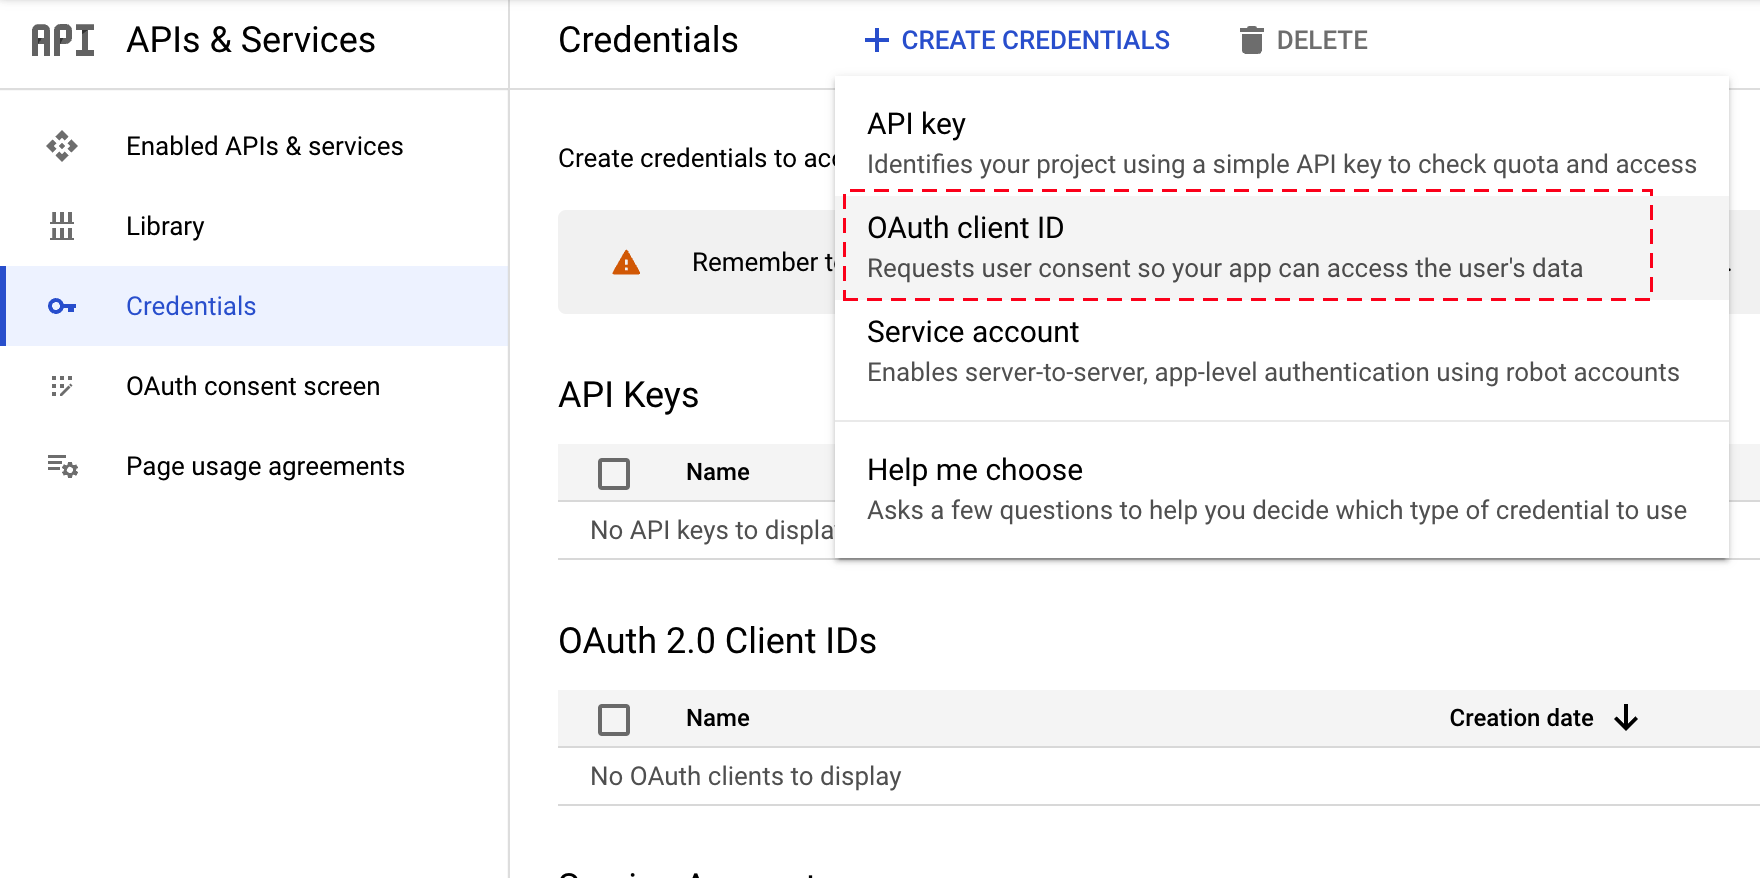
We are now ready to use the Open Authentication (OAuth) for the APIs that are part of our project. Click on the Credentials Icon, click Create Credentials, and select OAuth client ID from the drop-down menu (Step 6 below).
Step 6: Start the OAuth process
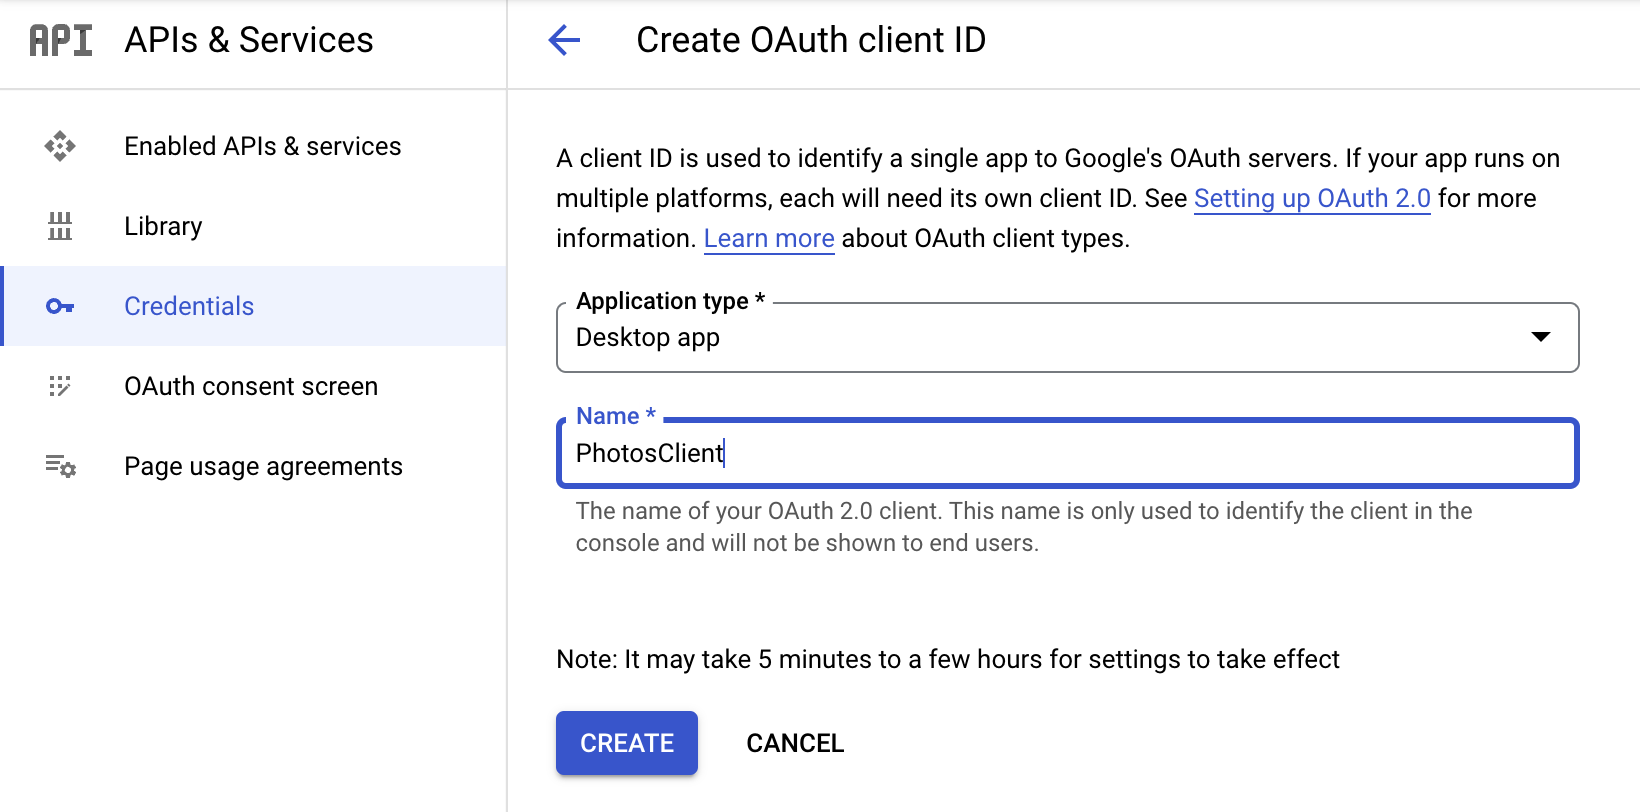
Set the Application Type to “Desktop App”, and provide a name to your app (Step 7 below).
Step 7: Set up a Desktop App
Save and download the JSON credentials file for later. It’s important that this information not be shared (Step 8 below).
Step 8: Download the JSON credentials

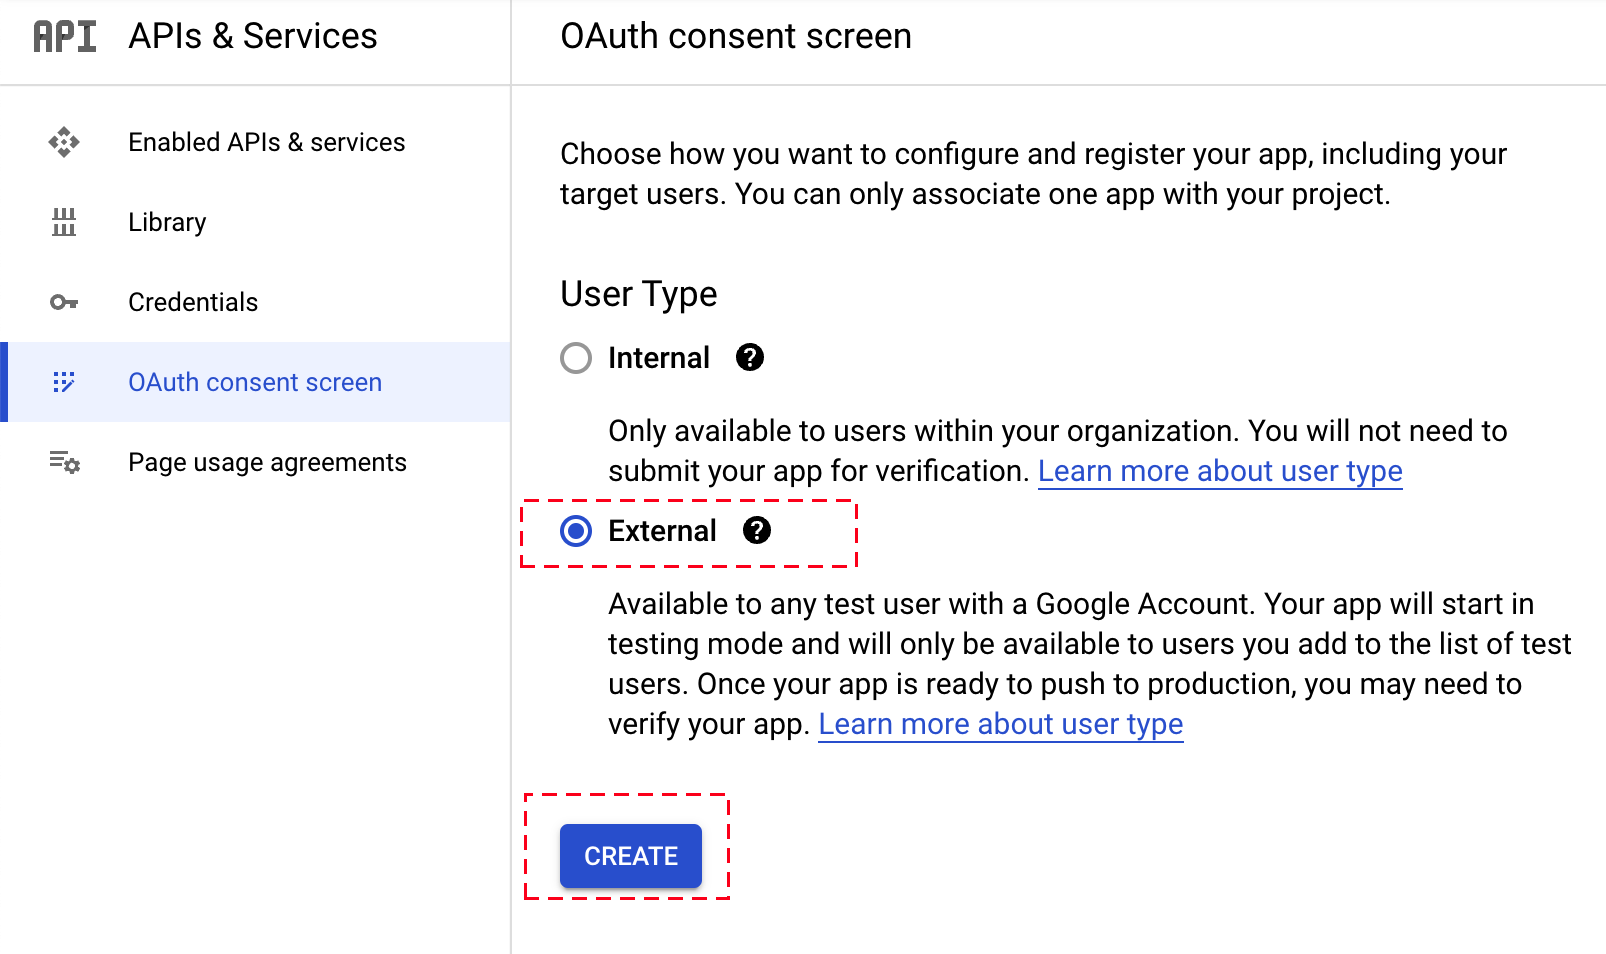
Now that the credentials are set up, we can configure the consent screen and add test users – which will be ourself. You will be prompted to select the type of OAuth, you would like, select “External” (Step 9 below).
Step 9: Set up external OAuth
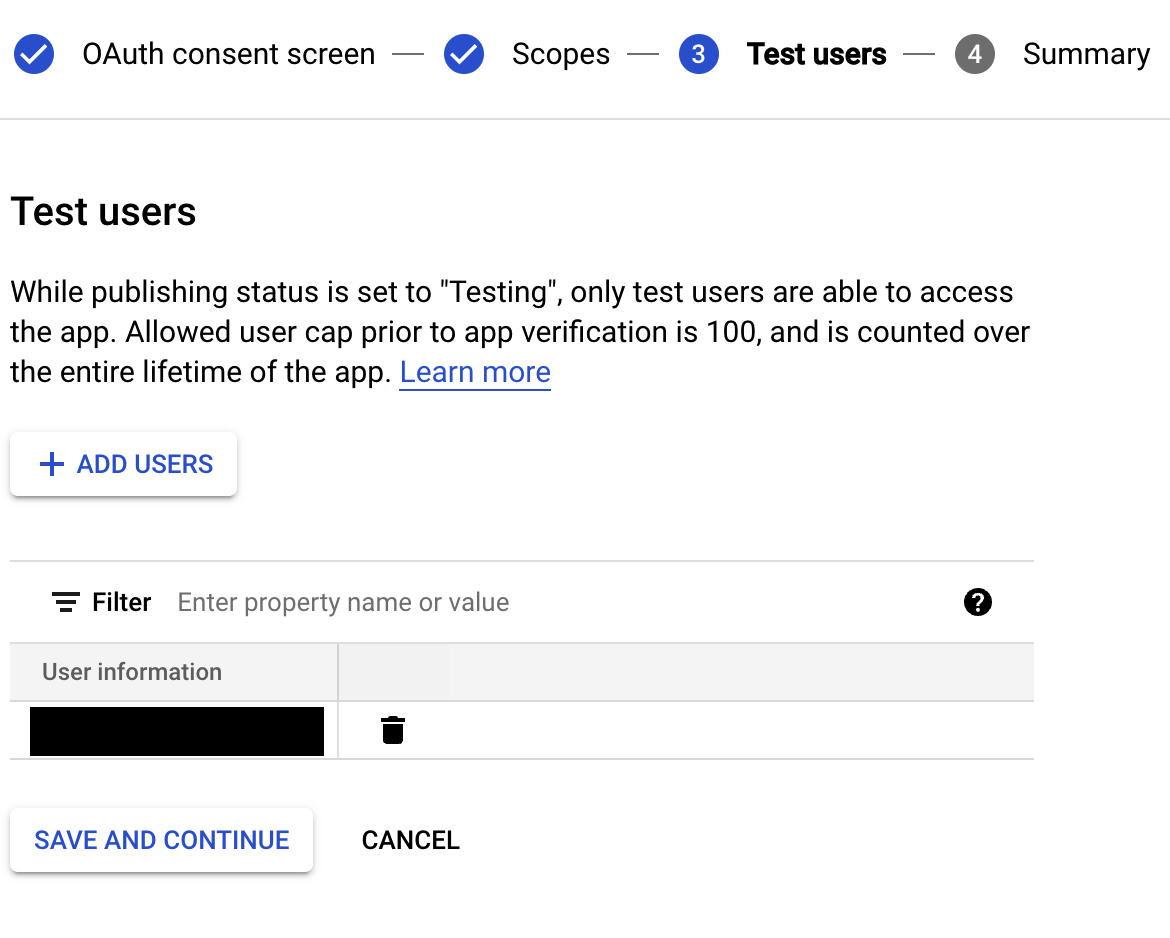
Add your email information and App title to the “OAuth consent screen” and the skip past the “Scopes” screen (this will be by the code). Once you get to the “Test users” screen, add your own email since you will be the only one using this product (Step 10 below).
Step 10: Add your email for a test user
At this point our Gmail API should be properly configured and we should be ready to use our python script.
(2) Prepare the gmailAPI repo
Now that we’ve set up our project and configured our credentials, we can use the gmailAPI repo to run a mail merge operation. To prepare our mail merge run, we need to do the following four things.
(2.A) Update JSON credentials
If you’ve followed the instructions above you should have a JSON file you downloaded from Step 8. Rename it to credentials.json and put it in the main folder. Refer to the template file to ensure the structure is the same.
(2.B) Attachments
If you’d like to include attachments with your email (optional), put the files you want to attach in the attachments/ folder. Note that when you actually run the script, you’ll need to specify the file types that will be included (see (3) for more details).
By default, the gmailAPI repo comes with two toy files: file1.png and file2.jpg. Delete these files before using the pipeline.
(2.C) Update the email list
Add one or more many .txt files to the emails folder which specify the emails you want to be included in the mail merge. For example, an emails/emails1.txt may look like:
jack@hotmail.com;    jazz@outlook.com
jim@gmail.com
Any spaces, semi-colons, or line-breaks will treated a possible separators. Angle brackets will be removed as well. For example John Doe <john.doe@email.com> will just become john.doe@email.com. For a “valid” email to be considered, it must contain an ampersand. Users can add as many .txt files to this folder, and all emails will combined for the final list (e.g. emails/emails2.txt, …, emails/moreemails.txt).
The gmailAPI repo comes with two toy files emails/list1.txt and emails/list2.txt. Delete this files before using the pipeline.
(2.D) Update the config file
The contents of the email and subject line are controlled by the config.py script. The config script found in this repo contains empty strings so that different users/clones can have different set-ups.
txt_message: Put your main message here.gmail_address: Put your gmail address here.subject_line: Put your subject line here.- There are four other parameters:
scopes,credentials,port, andmax_emails, but only adjust these if you know what you are doing.
Refer to the template file to see how it should be structured.
(2.E) Final structure and git
The tree below shows a possible configuration of the gmailAPI folder which will run successfully.
├── .gitignore
├── README.md
├── attachments
│	 ├── file1.png
│	 ├── file2.jpg
│	 └── readme.md
├── config.py
├── credentials.json
├── emails
│	 ├── list1.txt
│	 ├── list2.txt
│	 └── readme.md
├── environment.yml
├── send_emails.py
└── utils.py
Because users will need to update the credentials.json and config.py file, as well as deleted the toy samples in the attachments/ and emails/ folder, it is recommended that you stop tracking these files. You can run the code block below in the terminal to make sure your clone/branch of the repo does not get updated.
git update-index --skip-worktree credentials.json
git update-index --skip-worktree config.py
git update-index --skip-worktree attachments/file1.png
git update-index --skip-worktree attachments/file2.jpg
git update-index --skip-worktree emails/list1.txt
git update-index --skip-worktree emails/list2.txt
(3) Run send_emails.py for mail merge
We’re now ready to run our pipeline. I’m going to set a maximum image dimension of 1024, use attachments with that end of a .png or .jpg suffix (to match our two example files), and concatenate all emails if the filename ends with a .txt in the attachments folder (to match our two txt files).
conda activate gmailAPI
python3 send_emails.py --attachment_suffix png jpg --email_suffix txt --max_image_size 1024
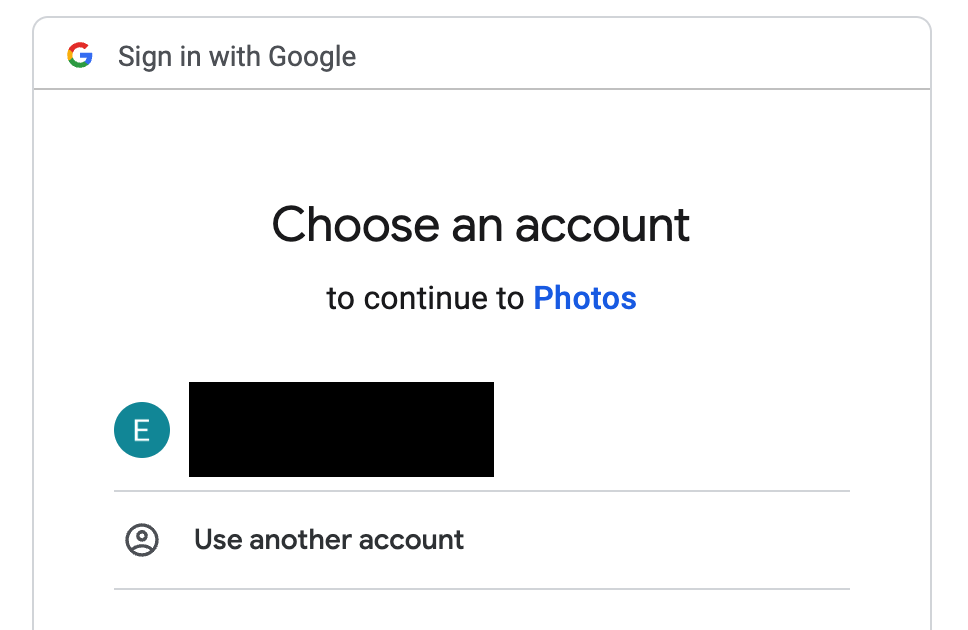
First, you’ll be prompted to sign in to your Gmail account (Step 11 below).
Step 11: Select your Gmail acount
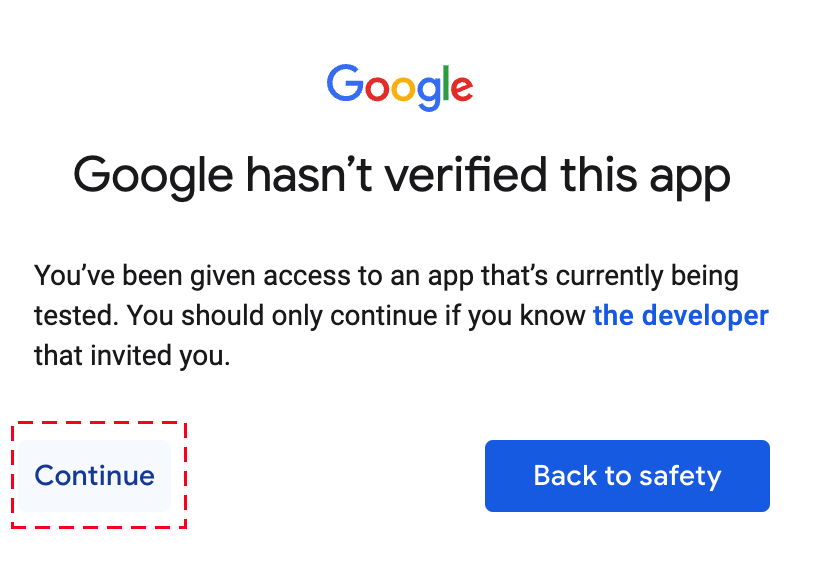
Next, press “Continue” to use this unverified App (Step 12 below).
Step 12: Use unverified App
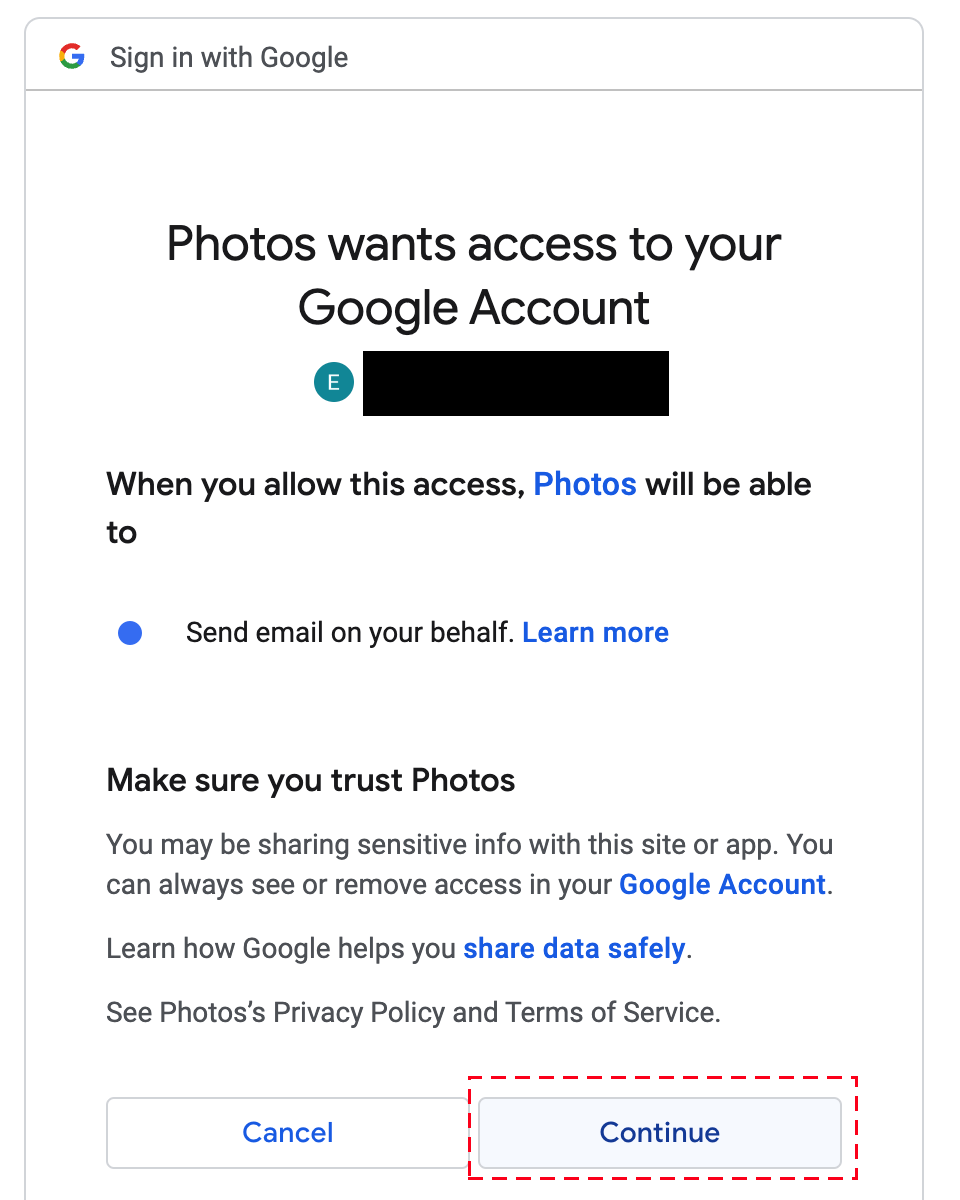
After that, you’ll be notified of the scope of this app. Notice that it says our Photos app (the name I gave it), will be able to send emails on your behalf. This is defined in the config.py file: scopes = ['https://www.googleapis.com/auth/gmail.send']. Press “Continue” (Step 13 below).
Step 13: Grant App email access to your account
The authentication process is now completed, and you should return to your console.
Authentication completed

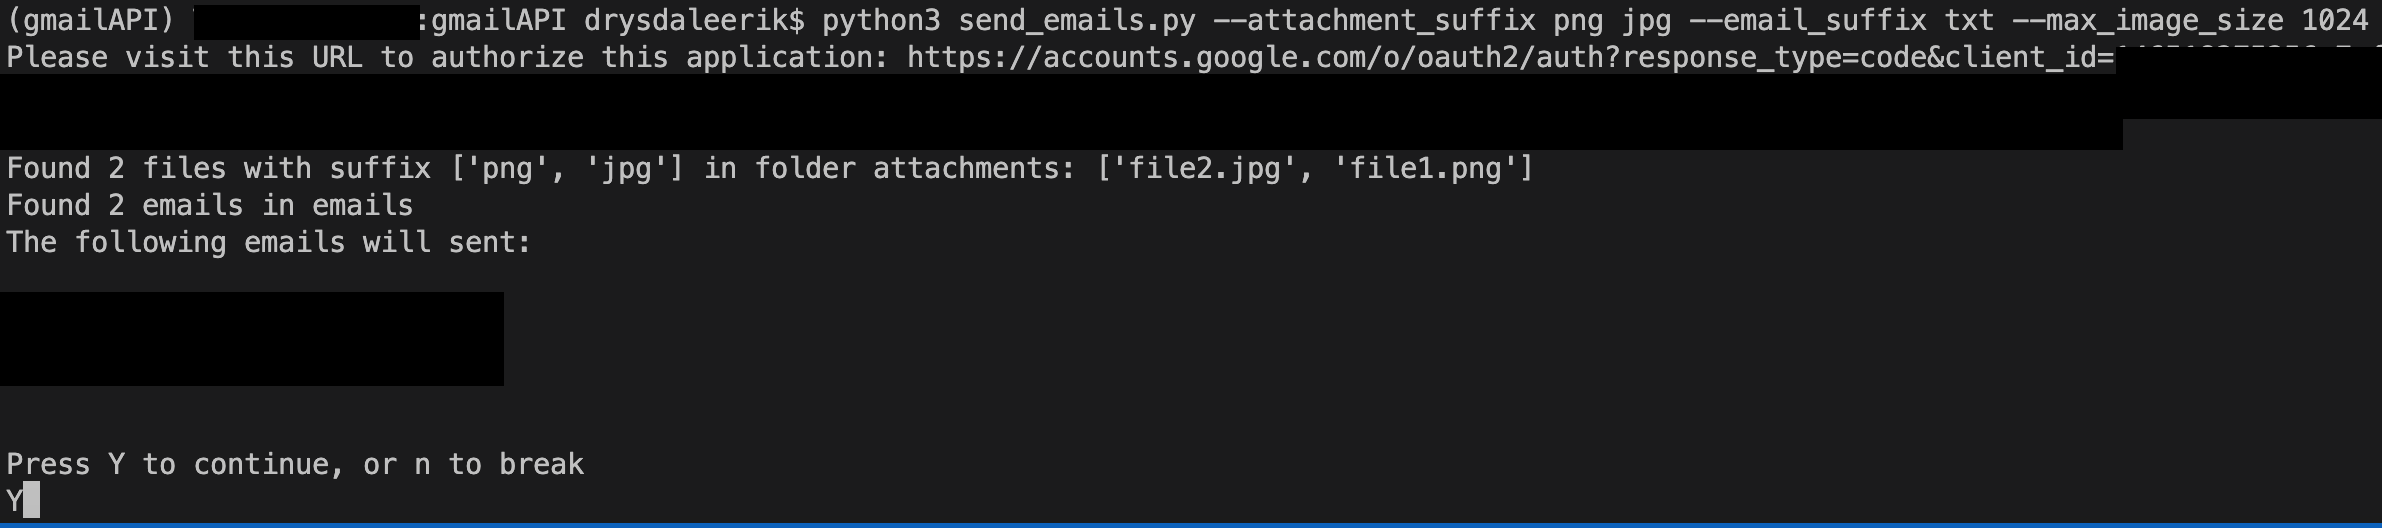
You’ll notice that in the console there will be a printed list of all the emails. If a browser did not pop up in Step 11, you can paste in the URL seen in your console. If you are happy with the list, press “Y” to send your email (Step 14 below).
Step 14: Press "Y" if email list is correct
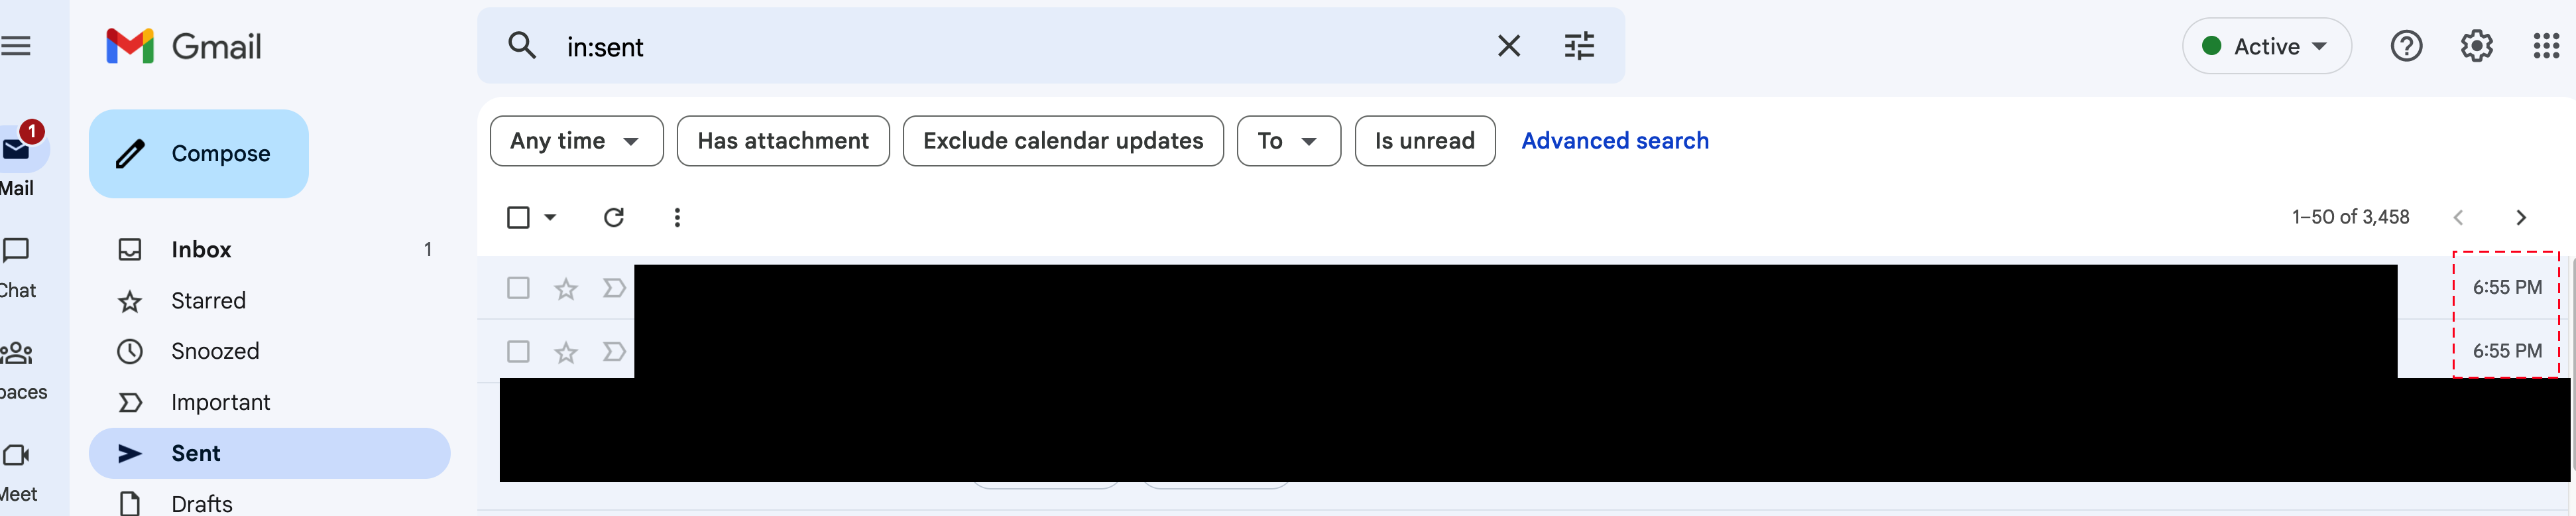
The script will then take about 1 second to run per 100 email addresses you are sending to. As a final step, you can the sent folder of your Gmail account to make sure the emails were sent.
Check your sent mail for confirmation
And voila, you have used the Gmail API to perform a mail merge operation.